Switch to Fast & Secure DNS
We have seen a very exciting development in the technology community!

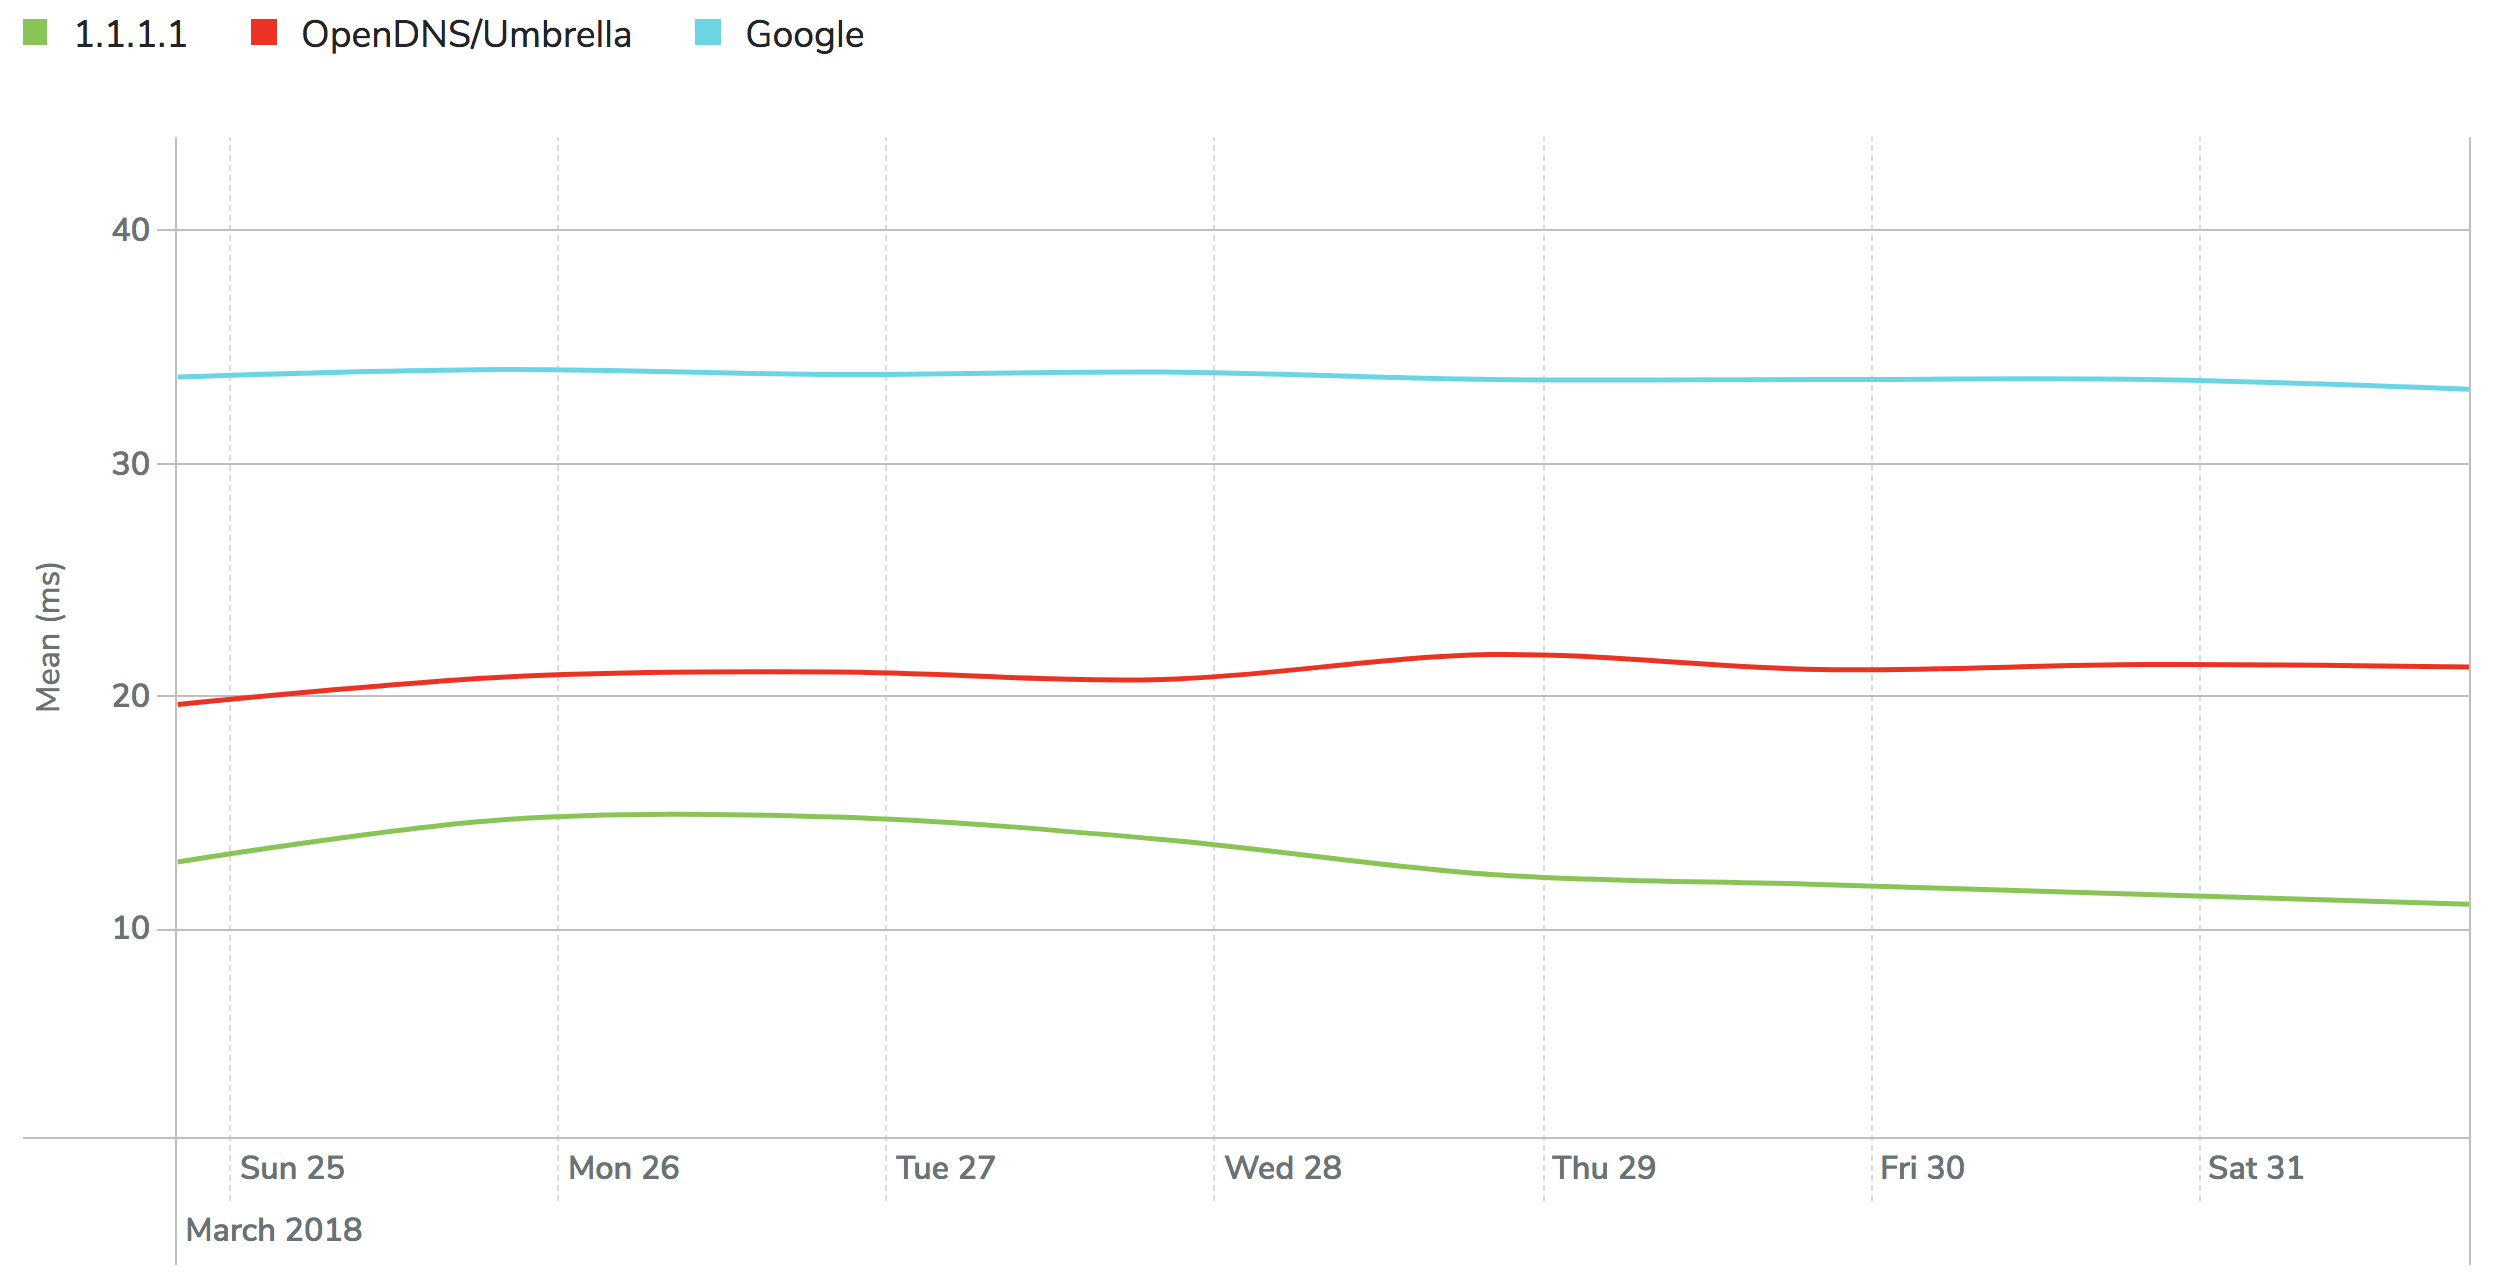
In today’s hectic online environment, it is easy to forget that there are many sites keeping tabs on your whereabouts. It could be your shopping preferences, political opinions, surfing habits, and much more. Cloudflare, a well-known Internet privacy and security company, just launched its 1.1.1.1 DNS service (with 1.0.0.1 as an alternate for redundancy). This new service is performance-driven and privacy-focused. Unlike their competitors such as Google and OpenDNS, Cloudflare’s 1.1.1.1 DNS service can reach faster resolutions as low as 11.3-14 milliseconds and clears its logs every 24 hours to prevent user tracking for your security. Their public DNS servers also support both DNS-over-TLS and DNS-over-HTTPS, making it harder for your ISP and others to keep track of you.
How do I get this service?
Windows Computers:
Open the Start Menu (you can do this by pressing the key with the Windows logo on your keyboard) and then click on Control Panel.
Click on Network and Internet, and then tap Change Adapter Settings.
Right-click on the Wi-Fi network you are connected to, then click Properties.
Select Internet Protocol Version 4 and click Properties, and then write down any existing DNS server entries for future reference.
Now tap Use The Following DNS Server Addresses, and replace those addresses with the 1.1.1.1 DNS addresses: For IPv4: 1.1.1.1 and 1.0.0.1; and For IPv6: 2606:4700:4700::1111 and 2606:4700:4700::1001
Click OK, then Close, and Restart your browser.
Macs:
Open System Preferences.
Search for DNS Servers and tap it.
Click the “+” button to add a DNS Server and enter 1.1.1.1 and 1.0.0.1.
Click “OK” and then “Apply”.
Linux Computers:
Open a Terminal (CTRL-ALT-T) and obtain sudo privileges with the command “sudo -i”.
Open the /etc/resolv.conf file with a text editor, such as gedit, to make the changes.
Add separate lines for the name servers, ensuring they are the only two IPv4 addresses there: 1.1.1.1 & 1.0.0.1
Add additional lines for the IPv6 addresses: 2606:4700:4700::1111 and 2606:4700:4700::1001
Save the file.
To ensure that your new settings are working, ping the domain name:
Android Devices:
Connect to a WiFi network.
Enter your router’s gateway IP address in your browser. Fill in your username and password.
In your router’s configuration page, locate the DNS server settings.
Replace any addresses with the 1.1.1.1 DNS addresses.
For IPv4: 1.1.1.1 and 1.0.0.1.
For IPv6: 2606:4700:4700::1111 and 2606:4700:4700::1001.
Save your settings, then restart your device.
iOS Devices (iPhone/iPad):
On the iPhone’s home screen, open the Settings option.
Open your Wi-Fi and then select your network in the list.
Tap “Configure DNS”, and then on “Manual”.
If there is anything already there, tap the “-” button, and “Delete” next to each of them.
Now, add 1.1.1.1 and 1.0.0.1 to the DNS address.
Tap the “Save” button on the top right when you are finished.
If you need assistance setting this up, contact us at [email protected] and we will do our best to reply in a timely response.
Remember to enjoy the increased resolution speed and keep yourself safe when working online by checking out some of our other online safety articles!